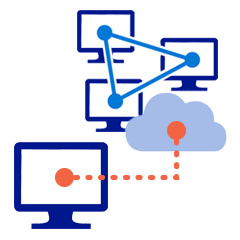
Use TrueStack Direct Connect to set up a Windows server in the AWS or Azure cloud
The following assumes that you have already performed the Initial Configurations in either Azure or AWS. If you haven’t set up TrueStack Direct Connect, follow the Initial Configuration Instructions below.
AWS Initial Configuration
Azure Initial Configuration
If you have an on premise server, this blog gives a summary of the process of migrating your on premise Windows domain controller and file server to AWS or Azure.
https://truestack.com/can-you-migrate-your-on-prem-domain-controller-to-the-cloud
Please read through our FAQ The Seamless Migration for tips related to bandwidth, scanners, printers, cloud backup and client/server line of business applications.
Set up a new Windows server in the cloud
Summary:
1. Set up TrueStack Direct Connect in the AWS or Azure Marketplaces. Follow the initial configuration steps here.
2. Launch a Windows server in your AWS or Azure account and set up a Windows domain.
3. Create Installers for your Windows computers using TrueStack Direct Connect.
4. Download them and install them on each Windows computer.
5. Add the Windows computers to the Active Directory domain.
6. Create file shares and manage the computers with AD.
Step-by-step Instructions:
- Launch TrueStack Direct Connect from the AWS Marketplace. Follow the directions for the initial configuration.
- Then launch a new Windows Server 2012 R2 or 2016 Instance or VM in your account.
- Connect to the Windows server and set up the domain. Be sure to install the DNS role on the Windows server.
- Find the private IP of the Windows server in the instance description in your AWS account or Virtual Machine tab in Azure, for example, 10.0.0.157.
- Create an installer in the TrueStack Direct Connect console for each computer that will connect to the Windows server. In the Windows IP field and in the DNS Server IP field add the private IP of the Windows Server. This will allow the Windows computer access to this cloud Windows server only and it will allow both the server and computers to communicate using DNS. A DNS server IP is also required for group policy and other server rules to communicate with the computers properly.

- Each installer is made for only one computer and will only work on one computer. Each installer contains a unique certificate which is used to create an encrypted VPN tunnel between the computer and the Windows server. To protect the security of your AWS servers ensure that the installer is only installed on the appropriate computer. Also ensure it isn’t compromised or stolen during or after distribution.
- Distribute the individual installers to each user. There are multiple ways to do this.
- You can copy the installer link and email it or send it another way to the computer user along with the security code. The user will need to enter the security code before it times out, in order to download their installer.
- Or you can download the installer yourself by clicking on the Download link by the security code. You can then send it to the user or put it an local share that the user has access to or copy it to their computer.
- Install or have the user install the software on their computer.
- After installation verify that that computers are connected in the console. If the computers are on and connected their names will appear in blue in the database.
- Now you can add the connected computers to your cloud Windows domain.
- We recommend opening file and print sharing on the windows firewall on the Windows server so the users can access the shared folders. You can also use a group policy to open file and print sharing for the domain connected computers so you can ping them and access them via a UNC path if required.
- After the computers are added to the domain you will them be able to manage them with Windows Active Directory as normal. For example:
- You can create file shares on the AWS server that these computers can access
- You use the Windows command line or powershell to send commands to these computers
- You can create group policies used to manage these computers
- You can set up and manage users in Active Directory
Read the Seamless Migration for additional considerations related to IOPS, bandwidth, printers, scanners and performance.
